
How to Get Started With Raspberry Pi
Introduction
The Raspberry Pi stands out as one of the most popular mini-computers available today, offering a versatile platform for both coding enthusiasts and those delving into Internet of Things (IoT) applications. Its capabilities extend to gaming, thanks to its improving graphics support, and networking applications, where Linux systems dominate.
Originating in the UK in 2012, the Raspberry Pi was initially designed to introduce young children to coding, making it accessible even to those without advanced technical knowledge. While some may be interested in building their own Raspberry Pi, this article is geared towards beginners who prefer to purchase a ready-made device and embark on their journey with ease.
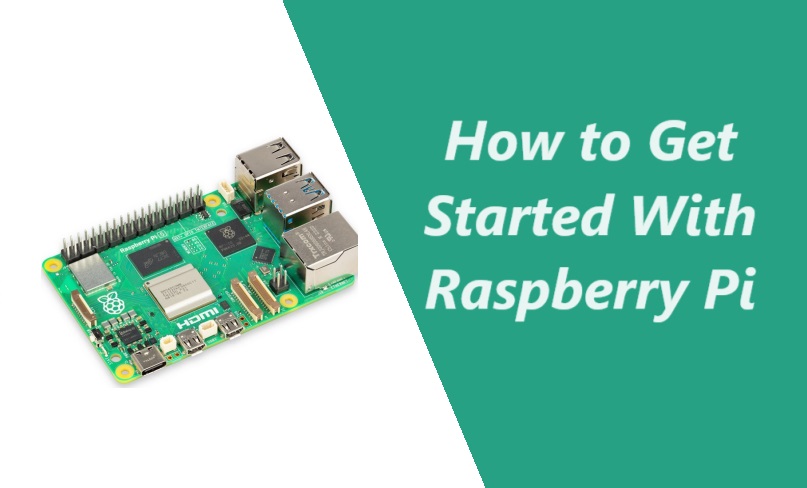
So, how does the Raspberry Pi operate? Essentially, it’s a credit-card-sized computer equipped with peripherals, memory, and a processing unit. What sets it apart is its user-accessible General Purpose Input/Output (GPIO) pins, totaling 40, which can serve various functions including power supply, data transmission, and analog signal input/output. This unique feature enables users to connect a myriad of peripherals such as LEDs, motors, and sensors.
As for its utility, the possibilities with the Raspberry Pi are limited only by one’s imagination. With its GPIO header, it can perform a myriad of tasks including controlling lights and motors, sending tweets, monitoring temperature, playing video games, and much more. In essence, the Raspberry Pi serves as a blank canvas waiting for users to unleash their creativity and explore its endless potential.
What You Need to Get Started
Unlike the Arduino, NodeMCU (ESP32/ESP8266), the Raspberry Pi is a complete personal computer. Therefore, you’ll require similar items as you would for a standard PC setup. Here’s what you’ll need to begin:
- The Raspberry Pi (Model 5, 4, or 3B+)
- Power Supply (5V)
- microSD card (Minimum 8GB)
- Mouse, Keyboard, and HDMI cable
With these essential components in hand, you’ll be ready to start your Raspberry Pi journey and explore its endless possibilities.
Suggested: What is Raspberry Pi 5 Tablet?
The Raspberry Pi
The Raspberry Pi is a low cost, credit-card sized computer that plugs into a computer monitor or TV, and uses a standard keyboard and mouse. It is a capable little device that enables people of all ages to explore computing, and to learn how to program in languages like Scratch and Python. It’s capable of doing everything you’d expect a desktop computer to do, from browsing the internet and playing high-definition video, to making spreadsheets, word-processing, and playing games.
What’s more, the Raspberry Pi has the ability to interact with the outside world, and has been used in a wide array of digital maker projects, from music machines and parent detectors to weather stations and tweeting birdhouses with infra-red cameras. We want to see the Raspberry Pi being used by kids all over the world to learn to program and understand how computers work.
For more information: https://iotbyhvm.ooo/raspberry-pi/

Big problem is Slecting a model of Raspberry pi. there are may models of RPi and you are not sure which to use.
If you want a balance between affordability and power, go for the Raspberry Pi 4. It’s like the RPi 5 but more budget-friendly. It can handle two monitors, with one supporting 4K video. Plus, it’s strong enough for heavy tasks like image processing. It also has USB 3.0 ports for faster data transfer and Bluetooth 5.0 for quicker wireless connections.
But don’t dismiss the Raspberry Pi 4 Model B. It’s still great and can run the latest Raspbian OS without any problems. You can choose from different RAM options: 1 GB, 2 GB, 4 GB, and 8 GB. Just pick the one that matches the power your project needs.
What about the older Raspberry Pi 3B? Well, it’s not as powerful as the RPi 4. The performance difference is huge, so it’s worth spending a bit more for the RPi 4 if you need the extra power. But if you’re on a tight budget, the RPi 3 is still an option.
The Raspberry Pi 3B+ is a good choice if you’re on a really tight budget. It’s not as powerful as the others, but it can still handle simpler tasks. Beginners who don’t need a lot of power might find it suitable, and it’s cheaper than the newer models.
Power Supply
To power up your Raspberry Pi 5 or 4, you’ll need a 5V/5A DC power supply with a USB-C end. For the Raspberry Pi 3 and older models, a 5V/2.5A DC power supply with a microUSB end is required. Newer models need more amperage because their CPU and GPU require higher power. Keep in mind that newer models consume more power over time, so consider this before purchasing. It’s crucial to buy a power supply with the correct rating to avoid issues with your Raspberry Pi. Be cautious of counterfeit power supplies, as they could damage your Raspberry Pi board.
You can check if your Raspberry Pi is getting enough power by looking at the red LED. If it stays on continuously, then the board is receiving sufficient power. If it blinks, the voltage has dropped to the minimum required level. If the red LED is off, the board has shut itself down due to lack of power. Always ensure your Raspberry Pi has the right power supply to keep it running smoothly.
microSD Card
To get your Raspberry Pi up and running, you’ll need an operating system (OS) stored on a microSD card. Unlike other computers where the OS is built-in, the Raspberry Pi relies on an external microSD card to store its OS.
In the past, the Raspberry Pi used larger SD cards, but now it uses smaller microSD cards. The size of the microSD card you need depends on the OS you plan to use. For the latest Raspbian OS, you’ll need at least an 8 GB microSD card, while the Raspbian OS Lite requires at least 4 GB. Other OS options might require more space. If you plan to switch between different OS frequently, a 32 GB microSD card is a good choice. Additionally, if you’re installing NOOBS, which is a beginner-friendly OS installer, you’ll need a higher-capacity card.
To set up your microSD card, you’ll need to burn the OS image onto it. Many users use Win32DiskImager for this task, but the official Raspberry Pi website recommends using the latest Raspberry Pi Imager for a simpler installation process.
Alternatively, you can download NOOBS and save its contents onto the microSD card. Then, insert the card into the Raspberry Pi and power it on. NOOBS will provide you with options to choose which OS to install. While NOOBS doesn’t require an internet connection like Raspberry Pi Imager, it does require a higher-capacity memory card. Consider your needs and preferences when deciding how to set up your microSD card for your Raspberry Pi.
Mouse, Keyboard, and HDMI Cable
Since the Raspberry Pi is essentially a complete personal computer, you’ll need some familiar accessories: a mouse, keyboard, and HDMI cable to connect to your monitor. Specifically, you’ll need a USB mouse and keyboard, although if you have a Raspberry Pi 4 or 5, you can also use Bluetooth versions. Alternatively, wireless mouse and keyboard combos that use a 2.5 GHz radio frequency will work too!
The Raspberry Pi comes equipped with two HDMI ports, allowing you to connect two monitors simultaneously. With the Raspberry Pi 4, one of the monitors can support a 4K resolution, while with the Raspberry Pi 5, both monitors can render in 4K. It’s worth noting that the Raspberry Pi 4 and 5 use micro HDMI ports, while the Raspberry Pi 3 uses full-size HDMI. Make sure to use the appropriate cables for your Raspberry Pi model to connect to your display devices.
How to Install an Operating System on an SD Card
For installing Raspberry PI OS, You’ll need a desktop application to burn your choice of operating system image to the SD card (memory card). If you’re a legacy type of person, you’ll need to know how to install NOOBs (alternative of Raspberry PI OS) on the Raspberry Pi. If you want the latest method, then go and download the Raspberry Pi Imager app.
Remember: The old name of the Raspberry Pi OS was “Raspbian.” However, it was later renamed to “Raspberry Pi OS” to better reflect its association with the Raspberry Pi platform.
Step 1: Select your Device, Operating System, and Storage:

I’m using the 64-bit version of Raspberry Pi OS on my Raspberry Pi 4, and I have the storage card connected to the USB port.
Here are some other operating systems you can try:
- Ubuntu Mate
- Snappy Ubuntu Core
- Windows 10 IoT Core
- CSMC
- LibreElec
- PiNet
- RISC OS
- Weather Station
Step 2: Customize your Raspberry Pi Settings (or not?)
Before you put your OS onto the microSD card for your Raspberry Pi, you can set it up in advance. This means you can pick your username and password, decide which WiFi network to connect to, or turn on SSH.
When you reach the screen shown above, select “Edit Settings.” But if you prefer to set up the Raspberry Pi after you insert the microSD card, just pick “No.”

In the “General” tab, you can adjust your hostname. The hostname is like your Pi’s name and helps you connect to it through SSH or VNC. By default, it’s set as raspberrypi.local, but you can change it. Another way to connect is by using the IP address, which is usually assigned by your router when the Pi connects to it.
You can also set up your username and password, set your WiFi, and choose your language and location in this tab.
Because Raspberry Pi OS is a type of Linux, it needs a username and password for most tasks. Without them, you can’t use many features or run programs.
If you have a Raspberry Pi 3 or 4, it has built-in WiFi, so you don’t need an extra WiFi dongle. This makes it easier to connect to wireless networks.

In the “Service” tab, you can turn on SSH. SSH, or Secure Shell, lets you control and manage your Raspberry Pi from another computer on the same network.
Choose “Use password authentication” if you want to log in with the username and password you set earlier. If you select “Allow public-key authentication only,” you’ll need to generate a key. This key is used to confirm your login.

In the “Options” tab, you’ll find more settings you can adjust. This includes things like playing a sound when the image burning process is done, ejecting the SD card automatically, and enabling telemetry. Telemetry is when your choice of OS is sent to a server for data collection.

Next, click “Yes” to apply your customization.

You’ll see a warning that all the content on the microSD card will be erased. Select “Yes” to continue. To avoid any errors, it’s a good idea to format your microSD card before using this application.

In above image, you can see the process of writing image. After completion, you will get a message. Wait until it finishes (do not remove the microSD card!)
Congratulations! Your microSD card is now prepared for use with the Raspberry Pi.
If you encounter issues with loading the OS, you can troubleshoot using the green LED on the board. If the green LED stays on constantly, it means the OS is loaded correctly. If it blinks continuously, there might be a data reading error. A pattern of three blinks indicates a failure in booting the OS. In such cases, you may need to remove the SD card, format it, and rewrite the OS.
Conclusion
Once you plug in your microSD card and power up your Raspberry Pi without any problems, you have a few options for using your new computer. You can use it without a graphical interface (GUI) by connecting remotely through SSH, or you can use a GUI by connecting with VNC.
To use VNC, open the terminal and type either “vncserver” for 32-bit systems or “vncserver-virtual” for 64-bit systems. But remember, you’ll need a VNC viewer on your main computer, and both devices must be on the same network.
The easiest way is to connect a monitor using an HDMI cable and use it like a regular computer.
Now you can start learning how to code with Raspberry Pi and create your own programs using languages like Python, QT, C++, and more! There are so many possibilities to explore!
I hope you found this unofficial Raspberry Pi guide helpful in getting started. Happy building!


