
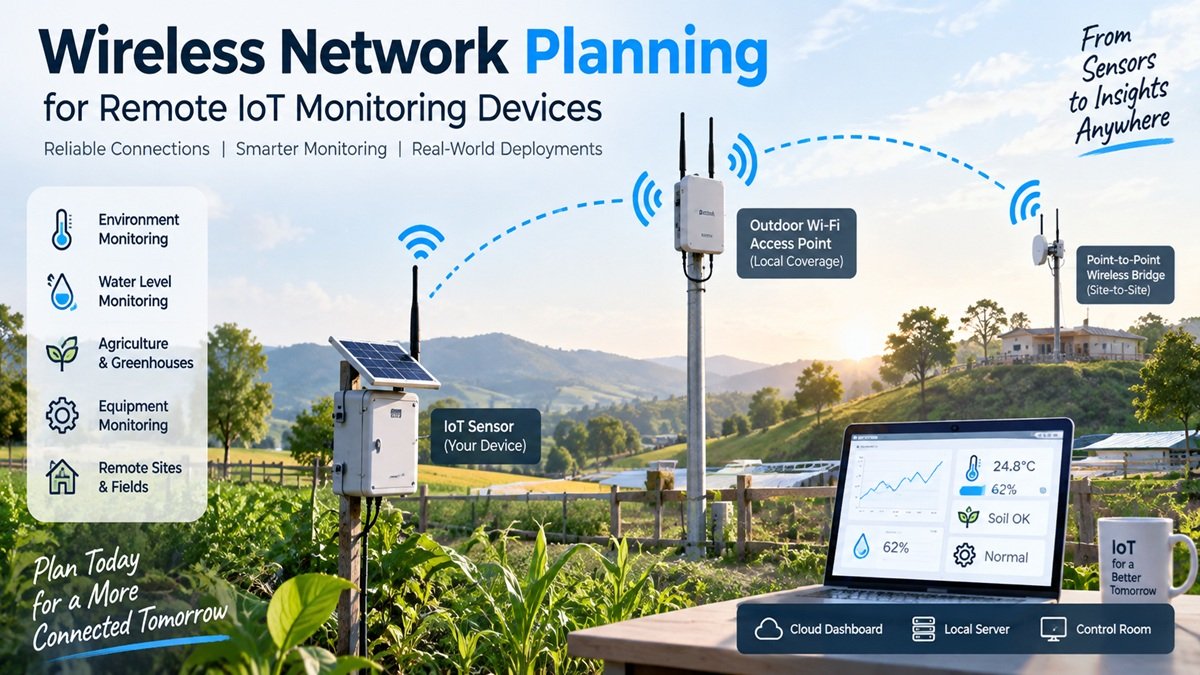
Wireless Network Planning for Remote IoT Monitoring Devices
Remote IoT monitoring succeeds when the network is planned around the physical site, not around the sensor on a workbench. A temperature probe, water-level controller, or equipment monitor may send only a small update, but it still needs a dependable path through walls, foliage, weather, power interruptions, and distance. The practical goal is simple: every important device should report when expected, and a missing report should be visible quickly.
Start by separating two jobs. Nearby devices need a local coverage layer, while a remote building or field location may need a backhaul path to reach the main network. When several monitoring nodes share an outdoor area, an outdoor Wi-Fi access point can be considered for the local coverage layer. The IoT controllers remain ordinary clients; the access point provides the place where they connect.
1. Map the monitoring job before selecting hardware
1.1 Start with what each device must report
List every remote point, the sensor it uses, the update interval, and what action the reading supports. A greenhouse station may report temperature, humidity, and soil moisture every ten minutes. A pump enclosure may report cabinet temperature, water level, and door status. A yard-mounted vibration sensor may only need to send an alarm. This list stops the project from treating all devices as if they need the same speed, power, and Wi-Fi coverage.
Then mark where the data must arrive: a cloud dashboard, a local computer, or a control room. The path between those two points is the network plan. Write down buildings, trees, gates, metal structures, electrical cabinets, and elevation changes. These are not background details; they often explain why a signal that worked during setup fails later in the field.
Bottom line: define the monitoring decision and physical obstacles before choosing radios, antennas, or enclosures.

Figure 1. Original, copyright-free architecture diagram for remote IoT monitoring.
2. Design the Wi-Fi coverage layer
2.1 Put coverage where the devices actually live
Mount the coverage device where it has the clearest practical view of the stations, not simply where it is easiest to reach. A device placed low behind a metal wall, water tank, stacked goods, or dense plants can leave a dead zone even when the site appears small. A pole or building corner can be useful when it raises the radio above common obstructions, provided its Ethernet cable, power method, grounding approach, and maintenance access are all planned at the same time.
Test from the final enclosure positions. Walk to each device location with a temporary node or phone and check that it reconnects after a restart. Repeat this check when doors are closed or after irrigation if those conditions change the site. Do not set the final mounting height from a signal reading taken beside the access point.

Figure 2. Original site-survey illustration. Test the final station locations rather than estimating coverage from a map.
2.2 Use Wi-Fi for coverage, not every long distance problem
Wi-Fi is usually the straightforward choice when remote controllers are spread around one property and can connect to the same local radio. It is less suitable when a monitoring site is separated from the router by a long open area or another building and pulling cable is impractical. In that case, a paired, directional link can carry the network to the remote site first. A point-to-point wireless bridge is relevant for this backhaul role: it links two fixed locations, while an access point or local switch at the far end serves the IoT equipment.
This distinction prevents a common mistake: asking a small sensor’s Wi-Fi connection to cross a distance that should be handled by dedicated site-to-site infrastructure. The sensor should have a short, predictable connection to its local network whenever possible.
Bottom line: use a coverage layer for client devices and a directional backhaul when the remote site itself needs to be brought onto the network.
3. Plan power and recovery with the same care as signal
3.1 Match the power design to the reporting routine
A remote device often fails because of power before it fails because of wireless signal. A controller can draw short bursts of current when it wakes, reads sensors, and connects to Wi-Fi. Use a stable regulated supply and protect outdoor cable entries from moisture. For a solar installation, account for battery capacity, charging conditions, cloudy days, and the extra energy used during connection attempts. Place a fuse close to the battery and avoid connectors where standing water can reach them.
Battery nodes should not keep trying to reconnect forever. A sensible routine is to wake, measure, attempt a connection for a limited time, send one update if possible, and sleep until the next interval. That behavior is easier to maintain and protects the battery when a router is restarting or a temporary obstruction appears.

Figure 3. Original reliability checklist for a remote IoT monitoring deployment.
3.2 Make failures visible to the people who need to act
Give each monitoring point a plain name, such as East Tank, Greenhouse North, or Pump Room. The dashboard should display the most recent reading and the time it arrived. Set a missing-data alert that matches the normal reporting interval. A station that is silent for an hour may require more urgent attention than one temperature value that is slightly high.
When troubleshooting, start with power, then confirm the device is reading its sensor, joining Wi-Fi, and delivering an update. This order avoids wasting time changing channels or moving equipment before checking a loose power lead or a wet cable gland.
Bottom line: reliable monitoring means knowing that the device is alive, not only seeing the last value it sent.
4. Use a site checklist before final installation
| Check | Why it matters | Practical action |
| Coverage | A device needs a stable path from its final enclosure. | Test signal and reconnect behavior at every installed location. |
| Mounting | Metal, water, foliage, and height affect the radio path. | Choose a clear, serviceable position with protected cabling. |
| Power | Voltage drops and moisture cause repeat failures. | Use a regulated supply, dry entries, and a realistic solar reserve. |
| Backhaul | A remote site may need its own link to the main network. | Use fixed site-to-site equipment when cable is not practical. |
| Recovery | A restart should not create a long service visit. | Test device and network recovery before leaving the site. |
A useful test sequence is to confirm a normal update, restart the controller, restart the local network equipment, and check that the dashboard reports the device again. Test the enclosure after rain or a wash-down where relevant. Record the installation location and the device name so the next person does not have to rediscover the layout.
Bottom line: the last hour on site should prove that the network can recover, not just that it can send one successful test message.
5. Practical deployment examples
5.1 Greenhouse and irrigation area
A greenhouse operator places one controller near seedlings and another by mature plants. Both report temperature, humidity, and soil condition. The access point is mounted where it sees both growing areas without a metal shed in the path. Before opening an irrigation valve, the operator checks one dashboard. If one bed remains dry after watering, the data identifies the zone that needs inspection instead of requiring a full walk-through.
5.2 Pump station beyond the office network
A pump station sits beyond the reliable range of the office Wi-Fi. A fixed backhaul link carries the network to the site, where a local access point serves a temperature sensor, water-level controller, and cabinet-door contact. The maintenance team receives an alert when an enclosure overheats, moisture appears, or a station misses its scheduled update. The result is fewer unnecessary visits and a clearer reason for the visits that remain.
Conclusion
Wireless network planning for remote IoT monitoring is a placement, power, and recovery problem as much as a wireless problem. Map the actual device locations, give nearby nodes a practical coverage layer, use a backhaul link when the site itself is remote, and test the conditions that normally cause outages. When every device has a short and predictable route to the dashboard, remote monitoring becomes easier to trust and easier to maintain.
Frequently Asked Questions
How often should a remote IoT device send data?
Use the slowest interval that still supports the decision. Many environmental checks work well with a 5 to 15 minute update, while alarms may need immediate reporting.
Should I place every remote sensor on the same Wi-Fi network?
Use one local coverage layer when stations are within a practical area. For a separate building or distant site, bring the network there first with a suitable backhaul plan.
What should I check first when data stops arriving?
Check power and the sensor reading first, then Wi-Fi association and the dashboard path. This order finds common field faults quickly.
Can solar power support remote IoT monitoring?
Yes, if the design includes a realistic battery reserve, regulated voltage, protected wiring, and a reporting routine that does not retry endlessly.
Why is a site survey necessary for small sensor messages?
Small messages still fail when the radio path is blocked or changes with weather and site activity. Testing the final installation locations is more reliable than estimating coverage.


